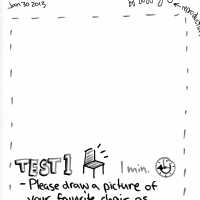
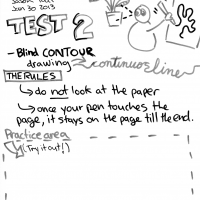
Below is a prototype for a drawing activity and presentation I have been experimenting with. It came about during an “instructional skills workshop” in which we are asked to prepare and deliver a 10 min. mini lesson. This activity is designed to get participants to see the world in a new way using a classic drawing technique called “blind contour drawing“. The images below are meant to be printed out and used during the lesson, but additional materials are needed to conduct a proper blind contour drawing activity.


I did a quick search for a more detailed instructions for a blind contour drawing activity, and came up with a couple of links. One of which was a very generic and solid .pdf from Xavier University, which I have copied and pasted below. Some others to check out…
http://en.wikipedia.org/wiki/Blind_contour_drawing
http://www.drawspace.com/lessons/view/b05
Blind Contour Drawing
The purpose of this assignment will be to familiarize students with a exercise in drawing that has been used by artists throughout history. Students will learn the significance of line in drawing as well as train their hands to truly draw what the eye is seeing. They will complete multiple quick blind contour drawings and then finalize with a image where they are allowed to focus on the object. Emphasis is placed on the development of the hand to accurately execute what the eye is seeing after the exercise not, on the quality of the blind line drawings.

Time: three to four class periods (broken up among other lessons)
Class: All levels
Materials: 18”X24” drawing paper (white & black), pencils, chalk & oil pastels. Several objects for still life.

Objectives:
1. become familiar with line as contour.
2. Be able to develop their hand - “minds eye” coordination.
3. Deconstruct drawing from a serious painstaking work to one that is quick and intuitive.
4. Express the emotion in the line.
5. Explore the variation of materials used to make the lines.
6. Blind drawings and finished drawings must be completed on the same piece of paper. (front & back if necessary) but, students need to # drawings to allow them to reflect on the process.

Procedure:
1. Set up still life in corner of room and have students arrange their chairs so that they must have their heads turned away from their paper to view objects.
2. Pass out paper and pencils to students.
3. Demonstrate to students how to do a quick 1 minute line drawing. Emphasizing that the drawing will not be high-quality and thats “ok”.
4. Explain that students are to draw the same perspective every time no moving or selecting a different area of interest.
5. Time several quick drawings varying times from 1 to 3 minutes.
6. Pause for reflection after the first 3 drawings. Ask students to reflect on what they see vs. what is being produced on the page. Do they see emotion in the drawing? Can they see some formation of the objects they are attempting to draw?
7. Allow students 15 minutes to execute a drawing of the still life after completing 5 blind contour “takes” of the objects.
8. Display quick drawings so that students may see that all struggle with this exercise and see how each develops from separating the eye from the hand.
9. Discuss with students the exercise. Did they find it useful? Freeing? Was it easier to execute their drawing after the blind drawings? Would they do it again?

Evaluation:
1. Referring to the position of the hand on the paper is minimal.
2. Demonstration of an attempt to accurately render the objects is perceptible.
3. Progression from the first drawing to final finished piece shows and increasing mastery of contour.
4. Constructive participation in classroom discussion of the method.

Sketchbook/Homework:
1. Execute 10 quick blind line drawings of 2 objects over 3' tall or 3' wide.
